Windows signing for your Electron app with Appveyor CI
As for macOS, you need to sign your Electron app for Windows. However, it's not mandatory to sign your app...

As for macOS, you need to sign your Electron app for Windows. However, it's not mandatory to sign your app to have auto-update working. Anyway it's strongly recommended that you sign the final app, so your user won't be shown a warning.
In this article we will describe how to automatize this in Appveyor. We will not cover which certificate provider to choose. Unlike for macOS, you need to purchase it from a third party. It is possible to create a 'dummy', one just so you can follow this tutorial by following this guide.
Creating Squirrel.Windows packages with Electron-forge
We will work with our example repo : https://github.com/rllola/electron-example
In this project, we are using Electron Forge. It has a module which we need to do the packaging and signing for Windows : electron-winstaller.
No need to install it. It is already available in our Electron Forge package. All we need is to do is to specify that we want to use it in our forge config by specifying squirrel as a target for win32.
"config": {
  "forge": {
    "make_targets": {
      "win32": ["squirrel"],
      "darwin": ["dmg","zip"],
      "linux": ["deb"]
   },
  ...
}
This build configuration will create a {appName} Setup.exe which is our installer for Windows. {appName}-full.nupkg and RELEASES are used during the update process.
Now we have to indicate where our certificate is and the associated password. This will happen in the electronWinstallerConfig section.
So far we only have this:
"electronWinstallerConfig": {
	"name": "electron_example"
}
The next step is to complete the configuration:
"electronWinstallerConfig": {
	"name": "electron_example",
	"certificateFile": "./example-electron.pfx",
	"certificatePassword": "<the-cerficate-password>"
}
You might notice that we have a small problem. We have to write our password in our code. This is not safe. We will come to this later. For now we will just write it, so we can test our signing locally.
You can build your app with npm run make.
We can then verify that the application has been signed with the signTool tool which is part of the Windows Software Development Kit (Windows SDK).
$ "c:\Program Files (x86)\Windows Kits\10\bin\x64\signtool.exe" verify /pa "c:\Users\Lola\Workspace\electron-example\out\make\squirrel.windows\x64\electron-example-0.0.21 Setup.exe"

File: c:\Users\Lola\Workspace\electron-example\out\make\squirrel.windows\x64\electron-example-0.0.21 Setup.exe
Index  Algorithm  Timestamp
========================================
0      sha1       None

Successfully verified: c:\Users\Lola\Workspace\electron-example\out\make\squirrel.windows\x64\electron-example-0.0.21 Setup.exe
Don't forget the /pa to verify the code signing!
Our executable has been signed successfully. Awesome!
Code signing in Appveyor
Now let's have this process automated by integrating it into our Appveyor config. We have to add the certificate and password to our Appveyor build.
Import the certificate
Similarly to Travis CI, we can't add a file in Appveyor and we would like to avoid having the certificate in our repository. So we are going to import as an environment variable.
base64.exe -w 0 <your-certificate-name>.pfxOr with clip if you want to have directly in your clipboard.
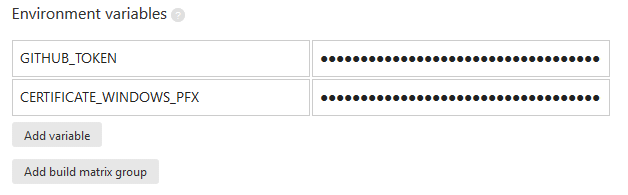
base64.exe -w 0 example-electron.pfx | clipNow let's paste it in our Appveyor settings as an environment variable. Be sure to have it as an encrypted variable so it won't show in the interface neither.
We can then recreate it in our appveyor.yml:
deploy_script:
  - echo %CERTIFICATE_WINDOWS_PFX% | base64.exe --decode > <your-certificate>.pfx
- IF DEFINED APPVEYOR_REPO_TAG_NAME (npm run publish)- Replace <your-certificate> with the name of your certificate.
We have successfully imported our certificate in our Appveyor build.
The certificate password
Now we are facing an issue as Electron Forge doesn't allow us to pass our password as variable environment and we don't want to have it in plain text in our json file.
However, lucky us, the build configuration can be written as a JS file. It will be then easy to import our variable environment.
Let's create our forge.config.js:
module.exports = {
"make_targets": {
"win32": [
"squirrel"
],
"darwin": [
"dmg",
"zip"
],
"linux": [
"deb"
]
},
"electronPackagerConfig": {
"asar": true,
"osxSign": true
},
"electronWinstallerConfig": {
"name": "electron_example",
"certificateFile": "./example-electron.pfx",
"certificatePassword": process.env['CERTIFICATE_PASSWORD']
},
"electronInstallerDMG": {},
"electronInstallerDebian": {},
"electronInstallerRedhat": {},
"github_repository": {
"owner": "rllola",
"name": "electron-example"
},
"windowsStoreConfig": {
"packageName": "",
"name": "electronexample"
}
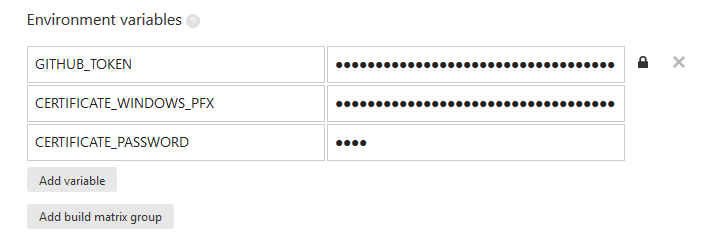
}Did you notice that we get the certificate password by using process.env['CERTIFICATE_PASSWORD'] ? It will assign the value that we are going to add in our Appveyor settings.
First we need to modify our package.json to indicate that we want to import this module as a configuration.
{
  ...
  "config": {
    "forge": "./forge.config.js"
  }
  ...
}
And now lets add our password in Appveyor.
BONUS
We can also verify our signature in our script.
deploy_script:
  - echo %CERTIFICATE_WINDOWS_PFX% | base64.exe -di > example-electron.pfx
  - npm run make
  - IF DEFINED APPVEYOR_REPO_TAG_NAME (C:\"Program Files (x86)"\"Windows Kits"\10\bin\x64\signtool.exe verify /pa ".\out\make\squirrel.windows\x64\electron-example-%APPVEYOR_REPO_TAG_NAME:~1% Setup.exe")
  - IF DEFINED APPVEYOR_REPO_TAG_NAME (npm run publish)
Be sure to have the correct executable name, so it will find the file. When Electron Forge generates the file, it will use the version in your package.json file so your tag has to start with v (recommended tag prefix by github), followed by the same version.
And that's all.
You can find a working example on our small repo : https://github.com/rllola/electron-example